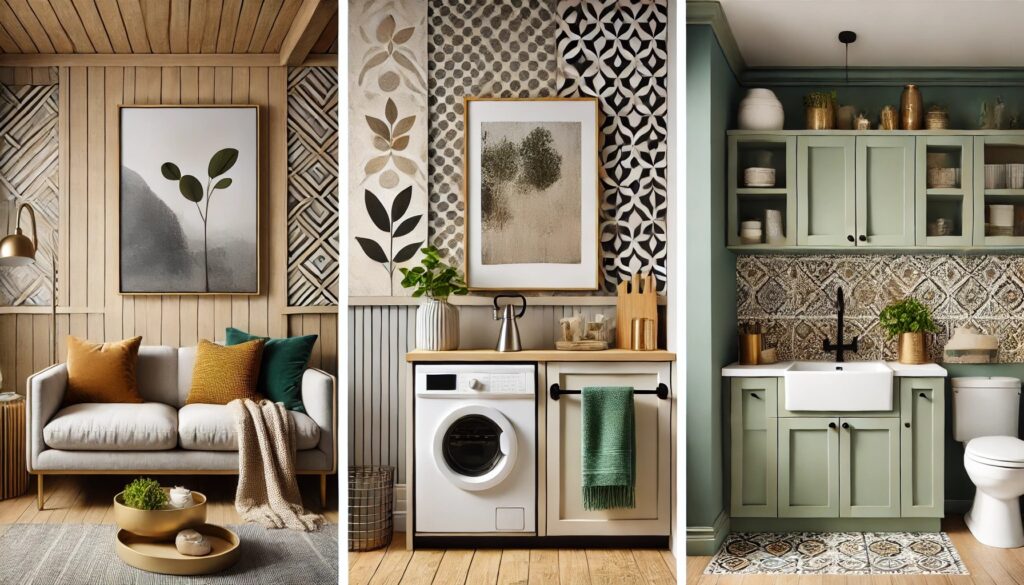
Diy wall art and decoration ideas Transform your blank walls into stunning masterpieces without breaking the bank! As someone who’s turned countless bare walls into conversation starters, I’m thrilled to share my tried-and-tested DIY wall art ideas that combine creativity with affordability Whether you’re decorating your first apartment or refreshing your long-time home, these ideas will help you create beautiful, personalized spaces without emptying your wallet.
Why DIY Wall Art is Having a Moment
The rise of DIY wall art isn’t just about saving money – though that’s certainly a compelling reason, with typical store-bought artwork ranging from $100 to $1000 or more. Today’s home decorators are increasingly seeking unique, personalized spaces that tell their stories. When you create your own DIY wall art, each piece becomes a conversation starter with its own special meaning. Plus, the satisfaction of pointing to a stunning piece and saying “I made that” is truly priceless.
Essential Materials and Tools: The Complete Guide
Before we dive into projects, let’s build your DIY arsenal. While the initial investment in supplies might seem significant, remember that most items can be used for multiple projects, making them incredibly cost-effective over time. check out this helpful DIY wall art tutorial.
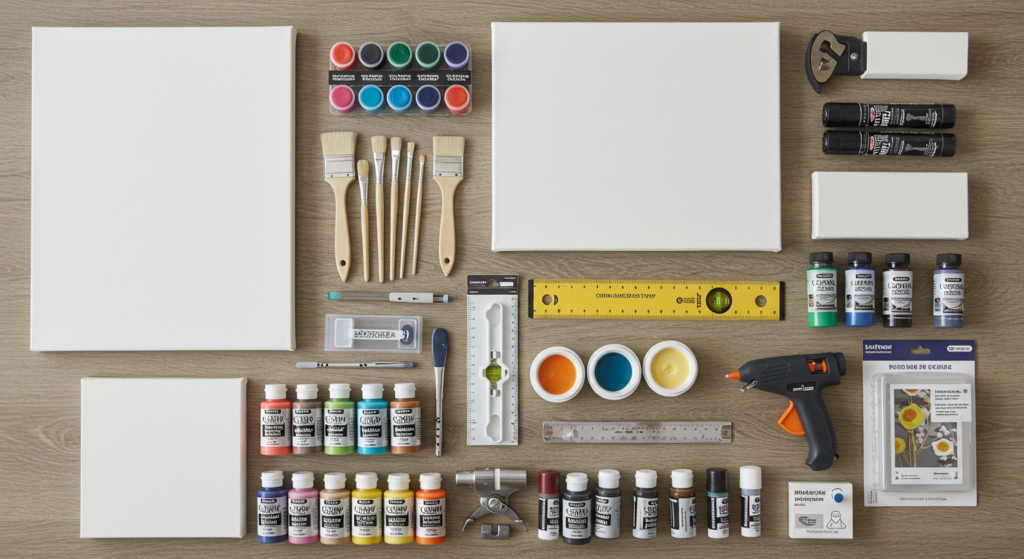
Basic Supply List(with Price Ranges):
- Canvas (various sizes) $5-20 each
- Acrylic paints $10-30 for a basic set
- Brushes $15-25 for a variety pack
- Scissors $5-10
- Ruler and level: $10-15
- Command strips or picture hangers $8-15
- Old magazines or decorative paper
- Hot glue gun $10-15
- Paint markers $15-20 for a set
Pro Supplies for Advanced Projects:
- Paint pouring medium: $15-20
- Texture paste: $12-15
- Gold leaf sheets: $10-12
- Professional framing tools: $30-50
- Canvas stretching pliers: $15-20
Pro Supplies for Advanced Projects used for:
- Paint pouring medium (for creating fluid art effects and preventing cracking)
- Texture paste (for adding dimensional texture and depth to canvas art)
- Gold leaf sheets (for creating metallic accents and luxurious surface treatments)
- Professional framing tools (for precise cutting, mounting, and archival-quality presentation)
- Canvas stretching pliers (for professionally stretching and preparing raw canvas)
Pro tip: I always recommend starting with more supplies than you think you’ll need. There’s nothing worse than having to pause mid-project for a supply run!I learned this the hard way when creating a large-scale abstract piece – running out of white paint mid-pour meant starting over completely.
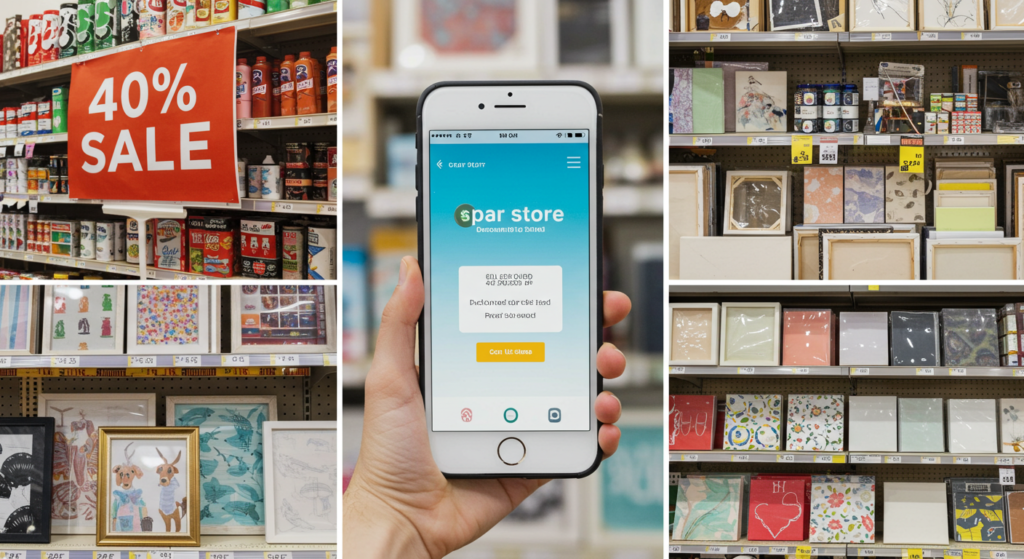
Smart Shopping Strategies
Save significantly on supplies by:
- Shopping during seasonal craft store sales (typically 40-50% off)
- Using store apps for additional discounts
- Buying basic supplies in bulk
- Checking dollar stores for simple frames and canvases
- Following craft stores on social media for flash sales
- Signing up for craft store rewards programs
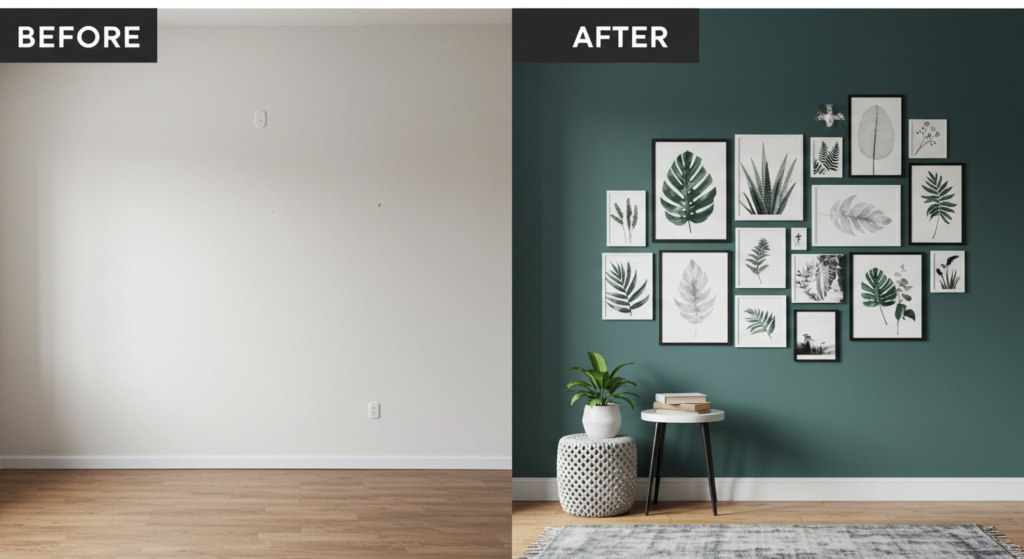
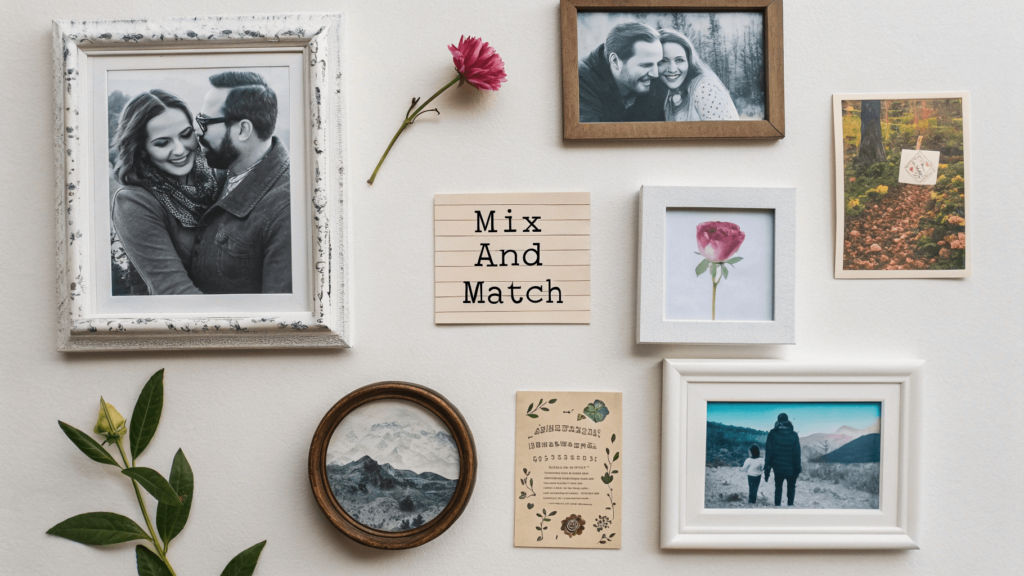
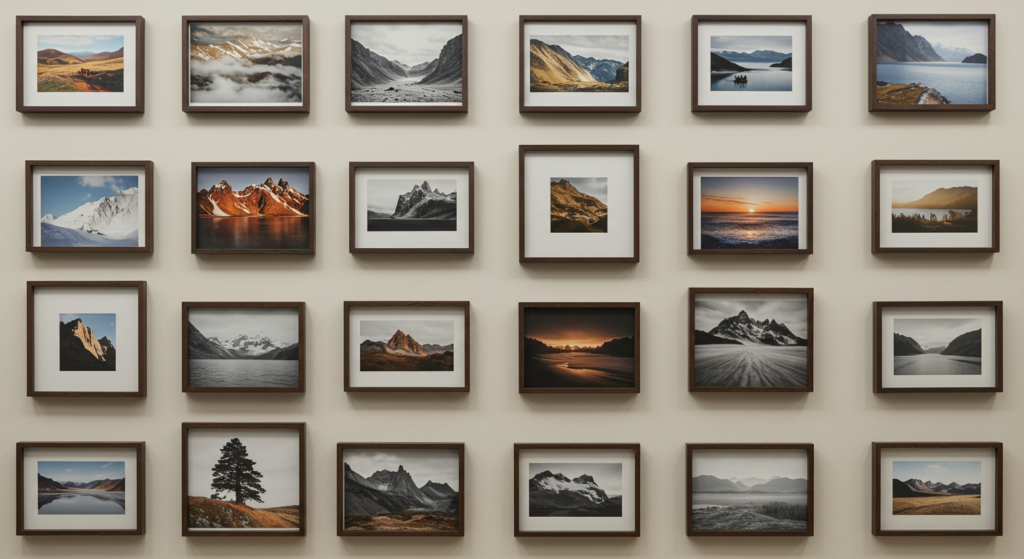
1. Create a Stunning Gallery Wall on a Budget
Creating a gallery wall might seem intimidating, but I’ll break it down into manageable steps that I’ve perfected through dozens of installations. The secret? Planning and preparation make all the difference between a professional-looking display and a wall full of misaligned frames. For inspiration and detailed tutorials, check out this comprehensive gallery wall guide.

Planning Your Gallery Wall
- Materials Needed:
- Various frames (I typically use 7-12 frames for a medium-sized wall)
- Kraft paper or old newspapers
- Painter’s tape
- Pencil and level
- Measuring tape
- Command strips or picture hangers
- Hammer and nails (if not using Command strips)
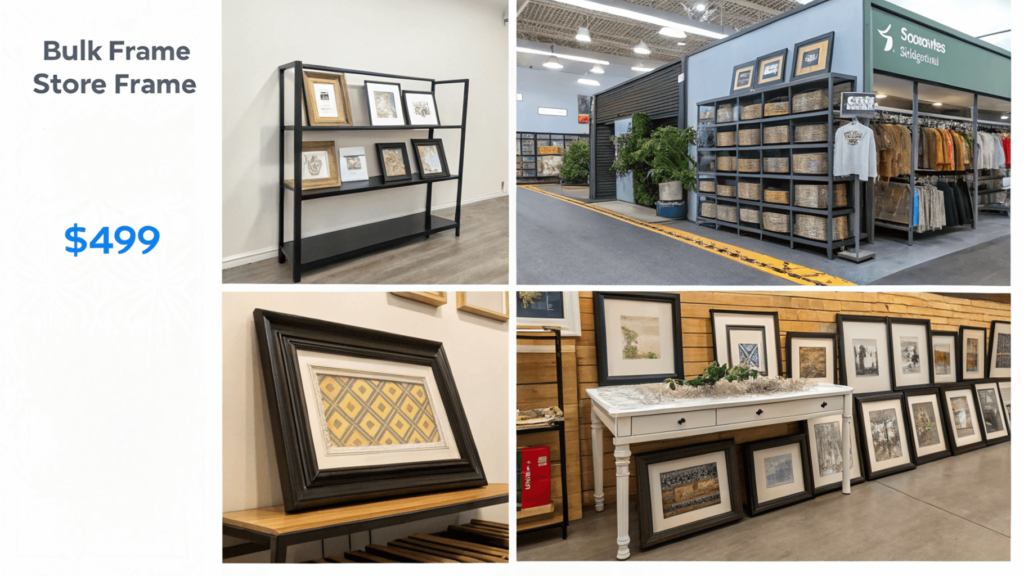
- Sourcing Frames Affordably:
- Thrift stores (my favorite source – I recently found 5 frames for $20)
- Dollar stores (great for basic black frames)
- IKEA’s RIBBA line (affordable and modern)
- Facebook Marketplace (often find bulk deals)
- Yard sales (negotiate better prices near closing time)
Pro tip: Don’t worry if your frames don’t match perfectly. You can unify mismatched frames with spray paint – I transformed an eclectic collection using matte black spray paint for under $10.
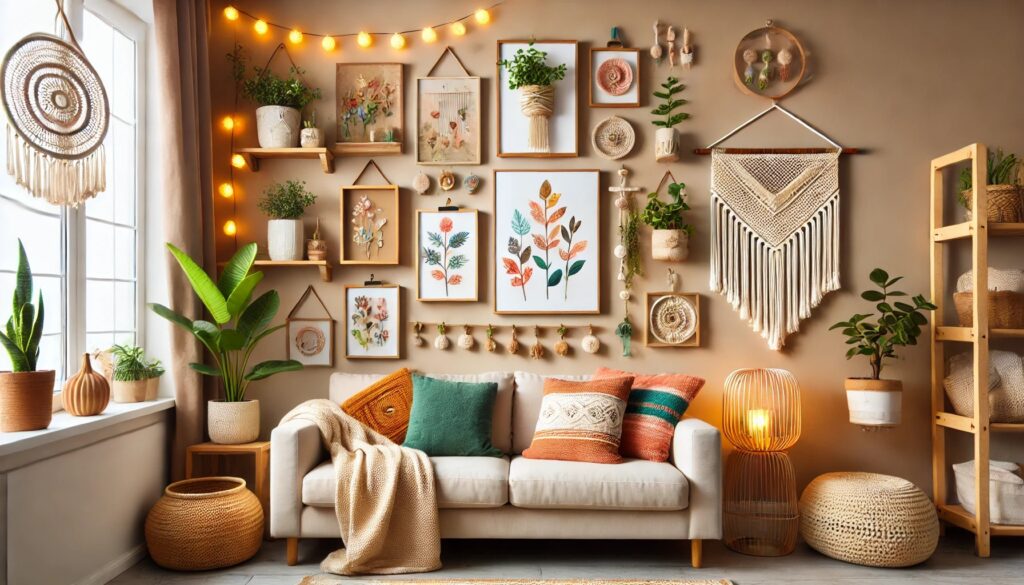
Content Selection
Mix these elements for visual interest:
- Family photos (both color and black & white)
- DIY art pieces (watercolors, prints, or sketches)
- Meaningful items (concert tickets, maps, postcards)
- Text pieces (quotes or typography)
- Small mirrors (creates depth and reflects light)
- Personal mementos (pressed flowers, children’s artwork)
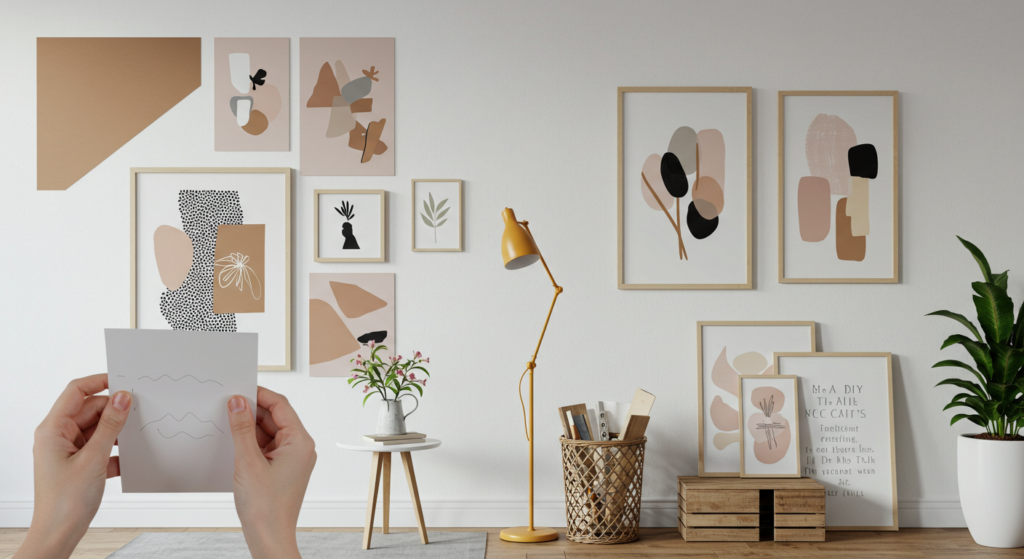
Layout Planning
Step-by-Step Process:
- Clear Floor Space
- Lay out a clean blanket or sheet
- Arrange frames on the floor first
- Take photos of different arrangements
- Choose Your Style:
- Symmetric: Equal spacing, aligned edges
- Asymmetric: Varied spacing, organic feel
- Grid: Perfect for same-sized frames
- Salon-style: Mixed sizes, more eclectic
- Create Your Layout:
- Start with the largest piece as an anchor (typically center or slightly off-center)
- Build outward from this focal point
- Keep spacing between frames consistent (2-3 inches works best)
- Stand back frequently to assess the overall look
Installation Tips
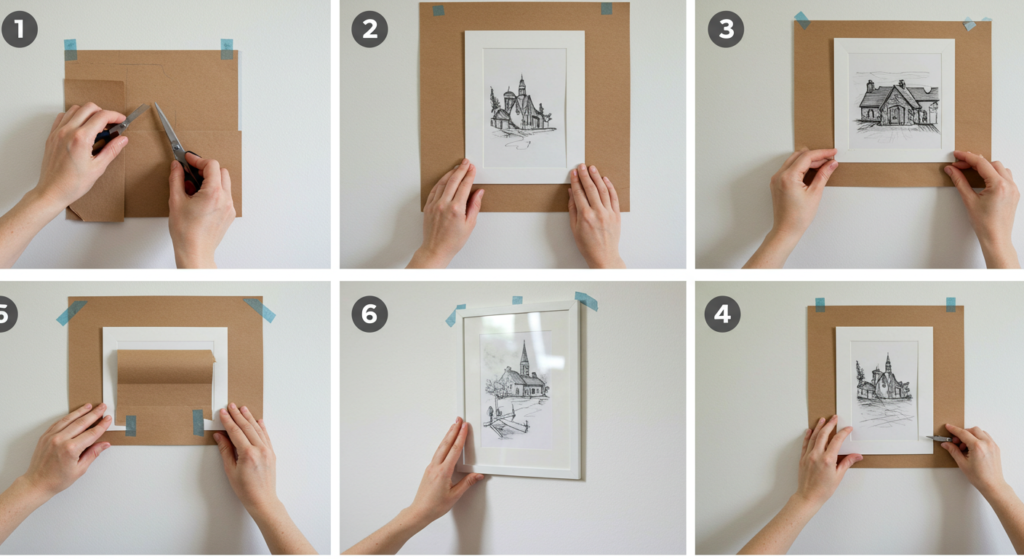
Precise Hanging Method:
- Trace each frame on kraft paper
- Cut out paper templates
- Mark hanger locations on templates
- Tape templates to wall using painter’s tape
- Step back to verify arrangement
- Install hangers through template
- Remove template and hang art
Pro Tips from My Experience:
- Start hanging at eye level (57-60 inches from floor to center)
- Use a level for each piece
- Consider using matching frames for family photos
- Place more dramatic pieces at eye level
- Keep heavier items toward the bottom
- Add small pieces last for visual balance
Budget-Saving Tricks
Print Photos Smartly:
- Watch for online photo printing sales
- Print in standard sizes to fit readymade frames
- Use engineering prints for large black and white photos (around $3 for 24×36″)
Frame Alternatives:
- Use clipboards for an industrial look
- Try wooden hangers for posters
- Create DIY frames from painted molding
- Use washi tape to create “frames” directly on wall
- Mount canvas prints without frames

Common Mistakes to Avoid
- Spacing Issues:
- Too much space between pieces creates disconnect
- Too little space feels cluttered
- Inconsistent spacing looks unplanned
- Height Problems:
- Hanging everything too high
- Not considering furniture placement
- Ignoring sightlines from different room positions
- Balance Mistakes:
- Too many heavy pieces on one side
- Uneven color distribution
- Lack of size variety
Maintenance and Updates
Keep Your Gallery Fresh:
- Dust frames weekly with microfiber cloth
- Check hardware monthly
- Update photos seasonally
- Rotate art pieces for variety
- Add new pieces gradually
Remember, a gallery wall is never truly “finished” – it should evolve with your life and style. I started with just five frames and gradually added pieces that meant something to me. Now it’s not just wall decor; it’s a visual story of my life and interests.
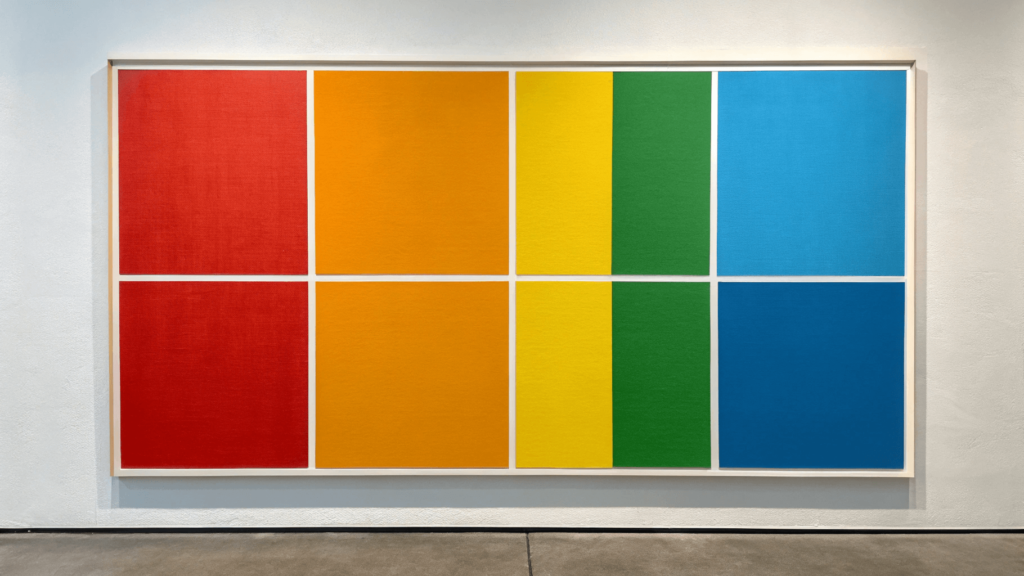
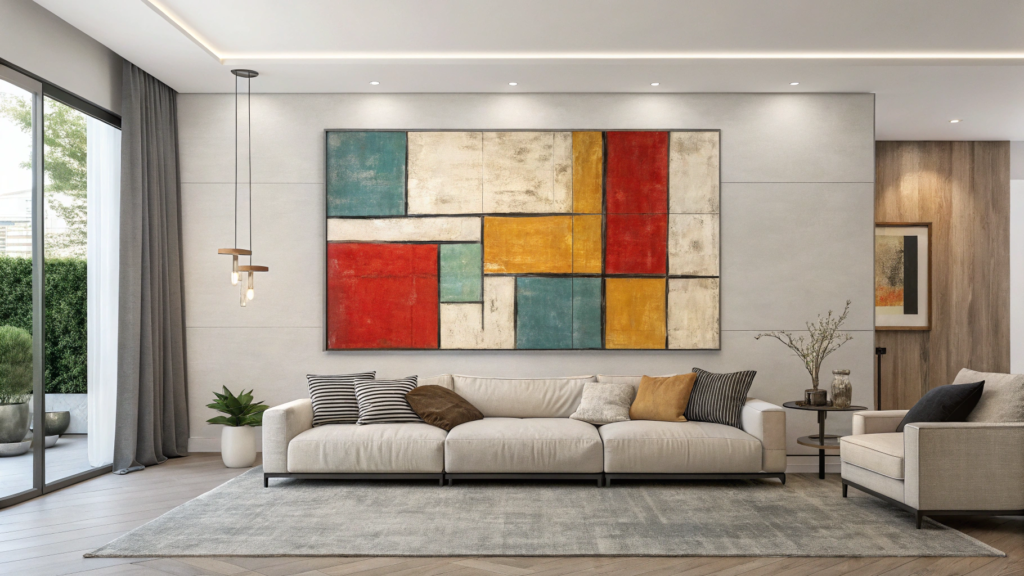
2. Canvas Art Techniques Anyone Can Master
From my experience creating dozens of canvas pieces, I’ve discovered that stunning canvas art is achievable for any skill level. Let me break down my most successful and beginner-friendly techniques that consistently create impressive results., check out this DIY wall art playlist.
Geometric Abstract Art: The Perfect Starting Point
This is my go-to when I need something modern and striking. Using painter’s tape, create geometric patterns on a blank canvas, paint over them, and remove the tape for clean lines.
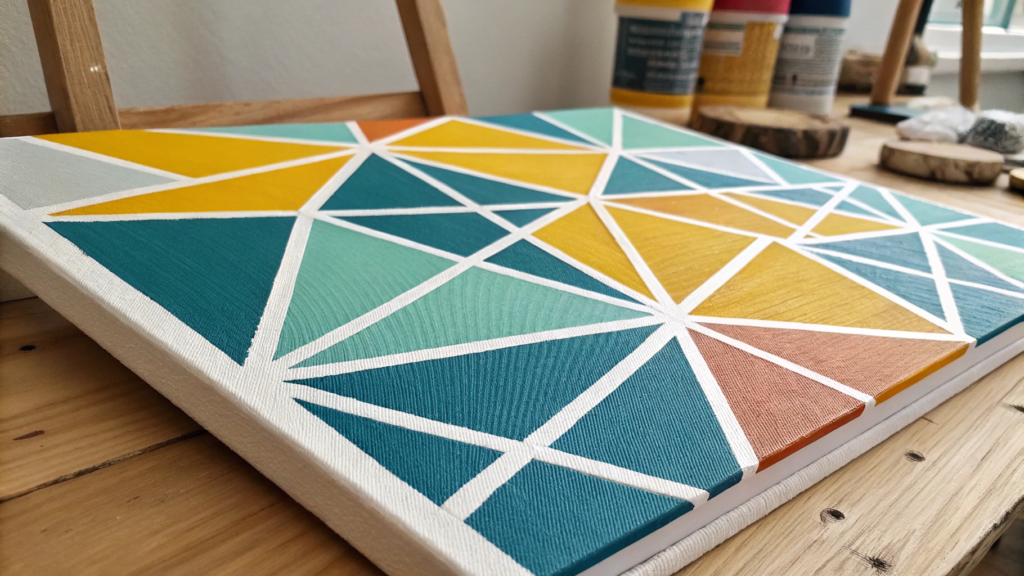
Materials Needed:
- Blank canvas (16×20″ recommended for beginners)
- Painter’s tape (crucial: get medium-width tape for clean lines)
- 2-3 complementary acrylic paint colors
- Foam brushes for smooth coverage
- Small detail brush
- Metallic paint (optional for accents)
Step-by-Step Process:
- Prepare Your Canvas
- Apply base coat in lightest color
- Let dry completely (usually 1-2 hours)
- Plan your pattern on paper first
- Create Your Design
- Apply tape in geometric patterns
- Press edges firmly with a credit card
- Keep angles consistent (30° or 45° work best)
- Consider leaving some negative space
- Paint Application
- Use thin, even coats
- Paint away from tape edges
- Apply 2-3 coats for solid coverage
- Remove tape while paint is slightly wet
- Touch up any bleeds with detail brush
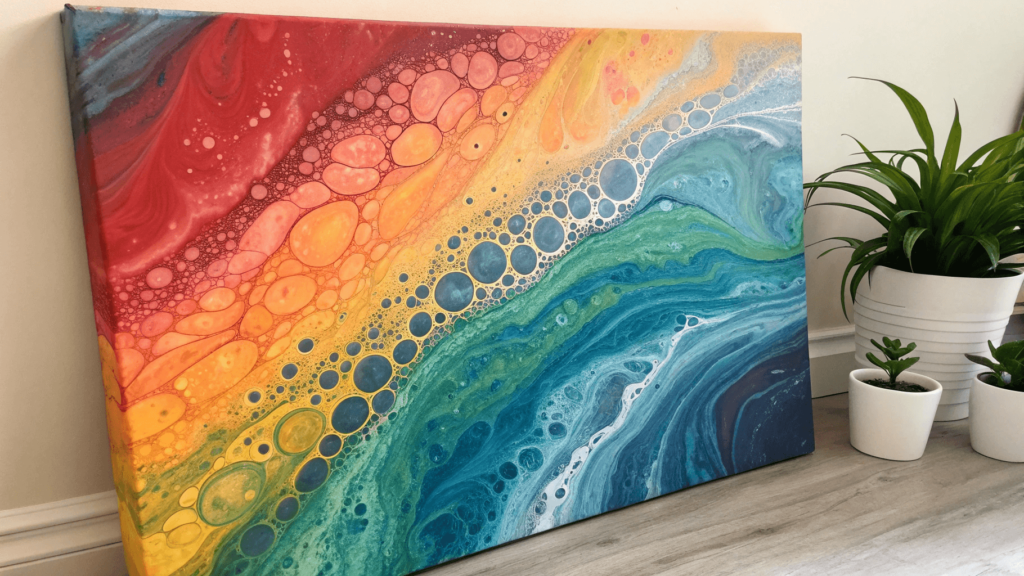
Pour Painting: Create Stunning Fluid Effects
This technique creates stunning, unique results every time:
Materials:
- Pre-primed canvas
- Pouring medium
- Acrylic paints
- Silicone oil (3 drops per color)
- Disposable cups for mixing
- Plastic sheeting for protection
- Level surface
- Torch or heat gun (optional)
Mixing Ratios:
- 2 parts pouring medium
- 1 part acrylic paint
- Few drops of water if needed
- 3 drops silicone oil per color
Technique Steps:
- Prepare Your Space
- Cover work area completely
- Level your canvas
- Mix colors separately
- Strain paint if lumpy
- Pour Options:
- Dirty Pour: Layer colors in one cup
- Flip Cup: Invert cup on canvas
- Swipe: Pull colors across canvas
- Tree Ring: Pour in concentric circles
- After Pouring:
- Tilt canvas to spread paint
- Use torch for cells (optional)
- Let dry 24-48 hours
- Seal with varnish
Textured Canvas Art
Materials:
- Canvas
- Modeling paste
- Palette knives
- Acrylic paint
- Texture tools (old credit cards, combs)
Techniques:
- Basic Texture
- Apply modeling paste in patterns
- Create waves, swirls, or geometric shapes
- Let dry completely
- Paint over texture
- Advanced Effects
- Layer different textures
- Add metallic highlights
- Create depth with dark/light contrast
- Incorporate found objects

Color Block Technique
Materials:
- Large canvas
- Acrylic paint
- Wide brushes
- Painter’s tape
Steps:
- Design Phase
- Sketch design on paper
- Choose 3-4 complementary colors
- Measure and mark sections
- Execution
- Tape off sections
- Paint largest areas first
- Remove tape while wet
- Add details last
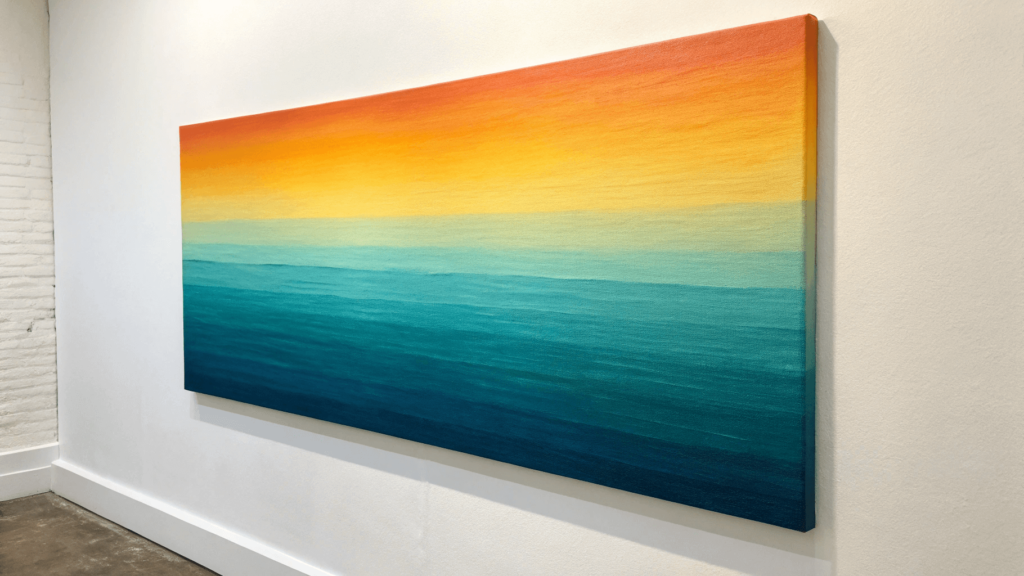
Gradient Effects
Materials:
- Canvas
- Two complementary colors
- Spray bottle with water
- Large brush
Process:
Wet the canvas slightly: Lightly mist the canvas with water from a spray bottle, just enough to dampen the surface, not soak it. Hold the spray bottle about 12 inches away and use a light, even spray that creates a slight sheen without pooling water.
Professional Finishing Touches
- Edge Treatment:
- Paint edges solid color
- Continue pattern around edges
- Leave white for modern look
- Sealing:
- Apply clear acrylic sealer
- Choose matte or gloss finish
- Two thin coats recommended
Troubleshooting Common Issues
- Paint Bleeding:
- Press tape edges firmly
- Use quality painter’s tape
- Remove tape at 45° angle
- Uneven Coverage:
- Apply multiple thin coats
- Use primer when needed
- Let each layer dry completely
- Texture Problems:
- Don’t overwork wet paint
- Clean tools between colors
- Wait for layers to dry
Pro Tips from My Experience:
- Always make test swatches
- Take photos of your process
- Clean brushes immediately
- Store canvas flat while drying
- Keep a “mistakes” canvas for practice
3. Budget-Friendly Wall Art Ideas That Look Expensive
After years of experimenting with budget-friendly art projects, I’ve discovered these high-end-looking techniques that won’t break the bank. Here’s my comprehensive guide to creating expensive-looking wall art on a shoestring budget.
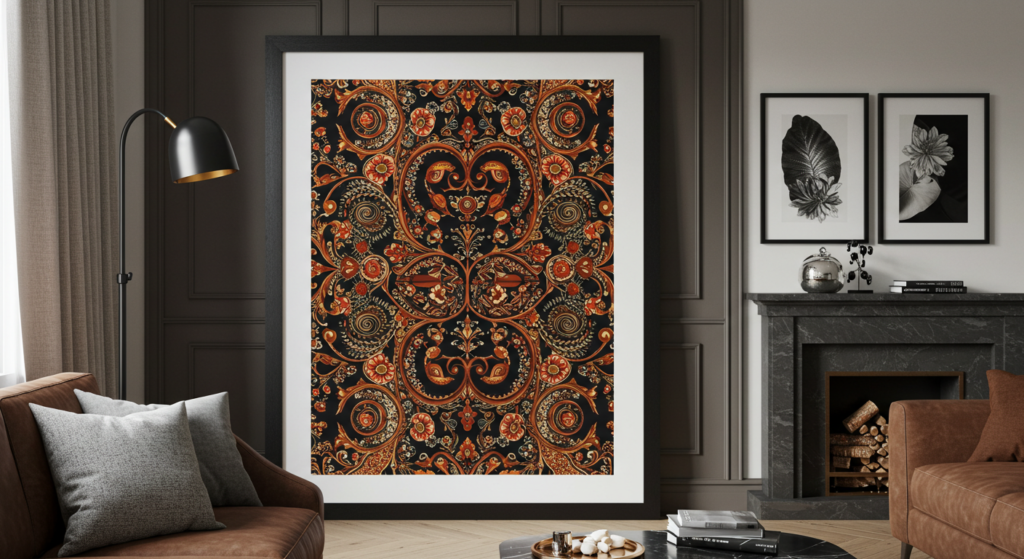
Framed Fabric Art: The Designer Look for Less
One of my favorite money-saving tricks is using beautiful fabric as art. I once transformed a $5 vintage scarf into a piece that guests constantly mistake for expensive artwork.
Materials Needed:
- Large frames ($10-15 at thrift stores)
- Beautiful fabric ($5-20/yard)
- Foam board ($3-5)
- Staple gun or strong tape
- Iron for pressing
Pro Tip: Look for bold patterns or textured materials that mimic high-end designer fabrics. Check remnant bins, end-of-season sales, and thrift stores for unique finds.
Step-by-Step Process:
- Selecting Fabric
- Look for bold patterns or textured materials
- Consider silk scarves from thrift stores
- Shop end-of-season fabric sales
- Check remnant bins for deals
- Framing Technique
- Iron fabric thoroughly
- Cut foam board to frame size
- Wrap fabric tightly around board
- Secure corners neatly
- Place in frame carefully
Pro tip: I once found a vintage Hermès-style scarf for $4 that, when framed, looks like a $400 piece of art!
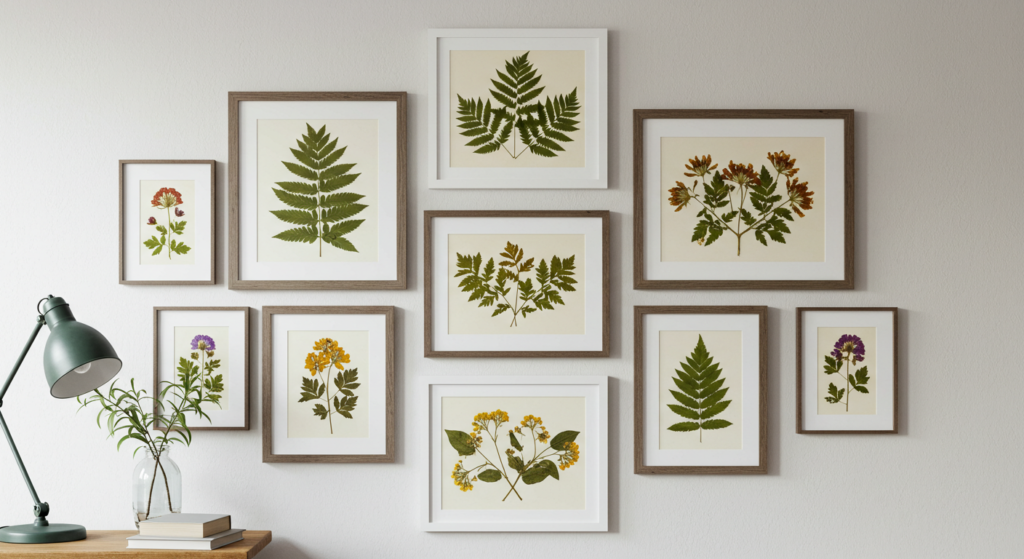
Botanical Prints
Create your own botanical artwork:
Materials:
- White cardstock ($5)
- Glass frames ($15-20)
- Pressed flowers/leaves (free!)
- Clear adhesive
- White mat board ($8)
Creating Your Collection:
- Collecting Specimens
- Choose flat flowers and leaves
- Press in heavy books for 2-3 weeks
- Select varieties with interesting shapes
- Arrangement Tips
- Use odd numbers of specimens
- Create symmetrical designs
- Leave plenty of white space
- Add scientific names for authenticity
DIY Large-Scale Art
For big impact on a small budget:
Materials:
- Canvas drop cloth ($10)
- Wood stretcher bars ($15)
- Acrylic paint ($20)
- Staple gun
- Basic tools
Methods:
- Abstract Minimalist
- Create large color blocks
- Use simple geometric shapes
- Add one metallic accent
- Keep design clean and bold
- Textured Technique
- Mix paint with drywall compound
- Create raised patterns
- Use monochromatic colors
- Add depth with layers
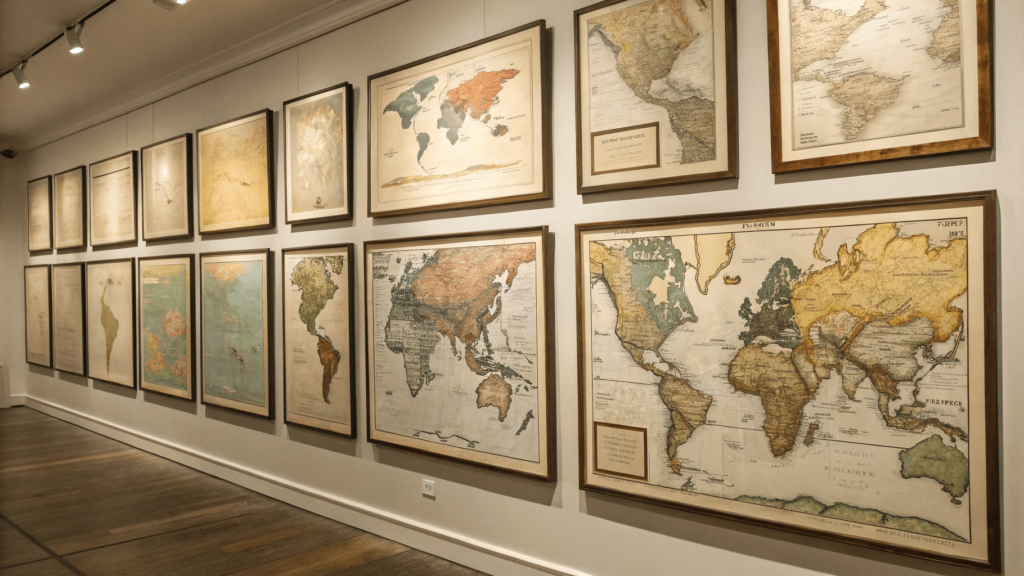
Vintage Map Art
Materials:
- Old atlases ($1-5 at thrift stores)
- Frames (various sizes)
- Acid-free mounting paper
- Double-sided tape
Creating the Display:
- Choose maps with similar colors
- Cut to size carefully
- Mount on acid-free paper
- Arrange in grid pattern
- Frame uniformly
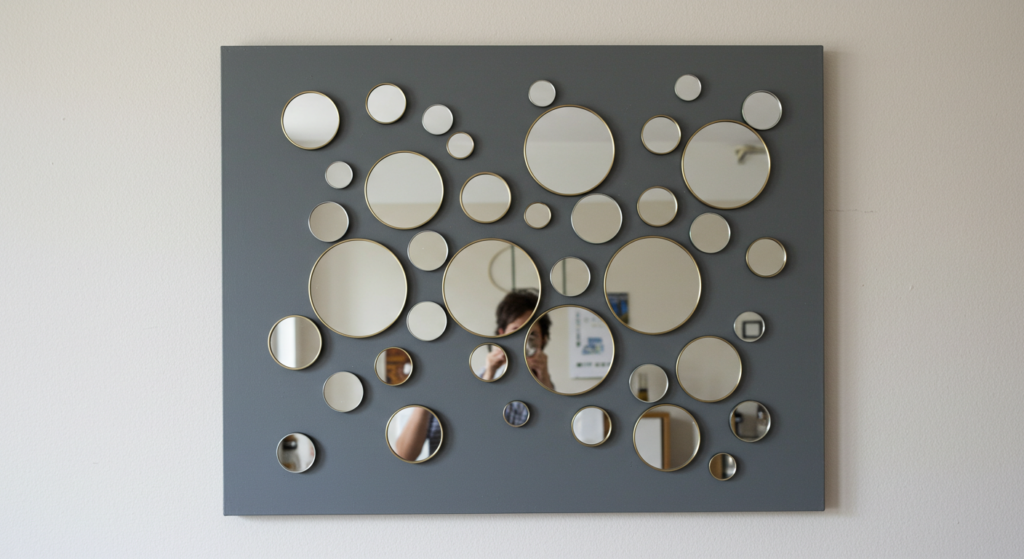
DIY Modern Mirror Art
Materials:
- Round mirrors ($5-10 each)
- MDF board ($8)
- Gold spray paint ($6)
- Picture wire
- Hanging hardware
Assembly:
- Paint MDF board black
- Arrange mirrors in pattern
- Secure with mirror adhesive
- Add hanging hardware
- Optional: paint mirror frames
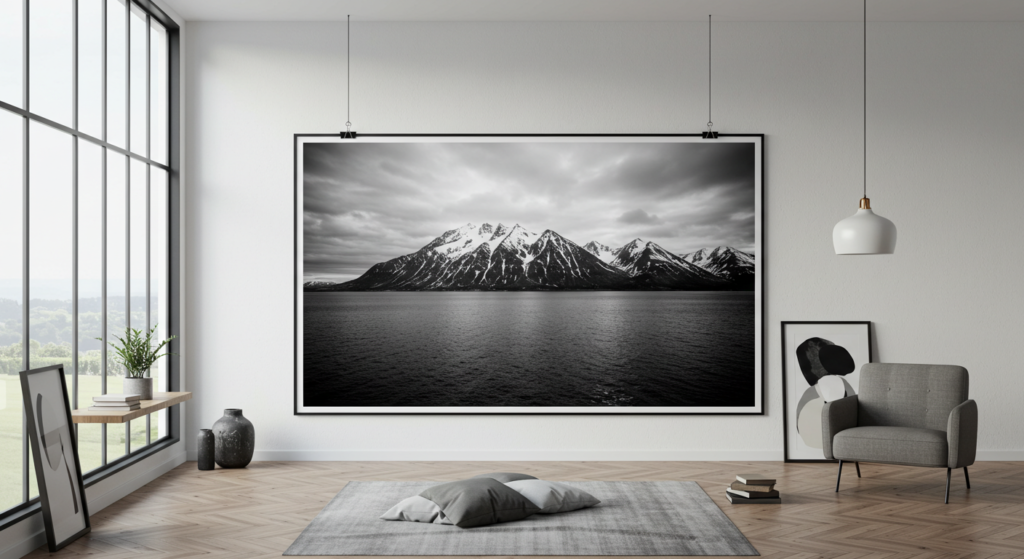
Oversized Photography Prints
Materials:
- Engineer prints ($3-7)
- Simple frames or clips
- Foam core backing
- Mat board (optional)
Tips:
- Convert photos to black and white
- Choose high-contrast images
- Scale up to 24×36″ or larger
- Use simple frames for modern look
4. Quick Weekend Projects Under $20
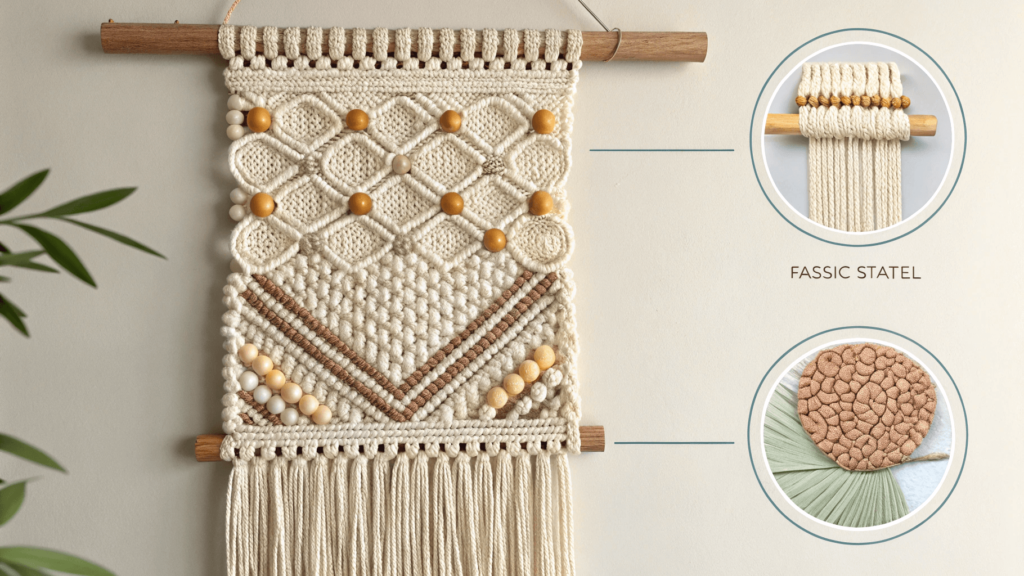
Woven Wall Hanging
Materials needed:
- Wooden dowel ($2)
- Yarn ($5)
- Beads (optional, $3)
- Scissors (already owned)
Total cost: $10, but looks like a boutique piece!
Basic Weaving Pattern:
- Create simple loom with dowel
- Start with basic weaving pattern
- Add texture with different knots
- Incorporate beads for interest
- Trim ends evenly
Paper Collage Art
This is perfect for using items you already have:
Materials:
- Cardstock in various colors ($10)
- Shadow box frame ($15)
- Adhesive
- Cutting mat and knife
Techniques:
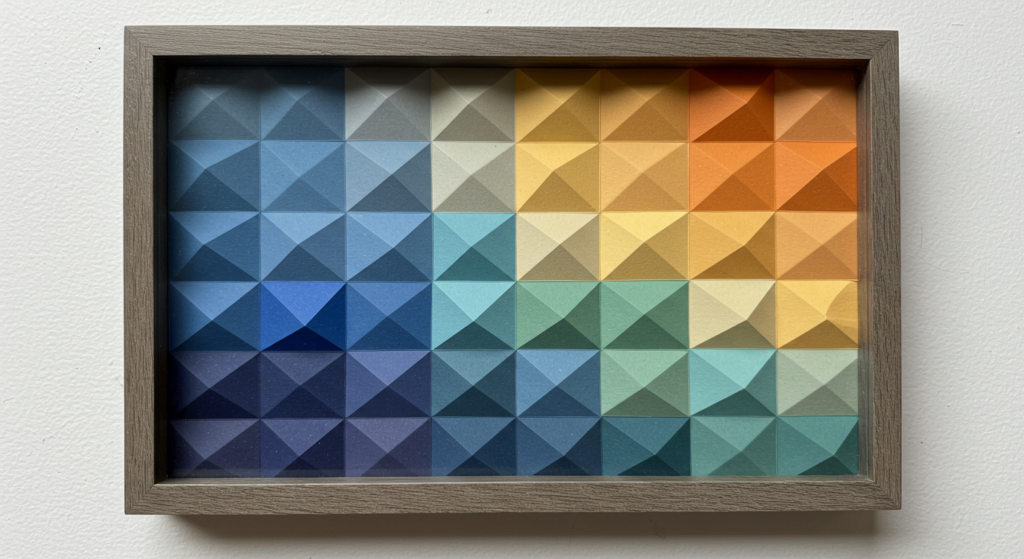
- 3D Geometric Shapes
- Cut identical shapes
- Fold precisely
- Layer for depth
- Create gradient effect
Tips for Professional-Looking Results
- Always measure twice before hanging
- Use proper lighting to showcase your art
- Keep scale in mind – bigger is often better
- Group similar items together
- Maintain consistent spacing between pieces
Common Mistakes to Avoid
- Hanging art too high (eye level is perfect)
- Using flimsy hanging hardware
- Not planning the layout beforehand
- Overcrowding the space
Maintaining Your DIY Wall Art
- Dust regularly with a soft cloth
- Keep out of direct sunlight
- Use glass covers for delicate pieces
- Check hanging hardware periodically
Conclusion: Your Walls, Your Story
Remember, the best wall art reflects your personality and style. Don’t be afraid to experiment and make mistakes – that’s part of the creative process! Start with one project and watch how it transforms not just your wall, but your entire living space.
Ready to start your DIY wall art journey? Grab those supplies and let your creativity flow. Your perfect wall art is just a project away!