“Tired of your boring room? Want to create a space that reflects your personality without blowing your budget? We all deserve a personal sanctuary that feels both comforting and inspiring, but achieving that Instagram-worthy aesthetic doesn’t have to drain your wallet.
When I moved into my first apartment, I was working with a tight budget but desperately wanted to transform my plain white walls and basic furniture into something that felt like me. After spending hours scrolling through Pinterest and saving ideas I couldn’t afford, I discovered the magic of DIY decor. With just $30 and a weekend of crafting, I created a gallery wall and string light installation that completely transformed my space—and got me more compliments than anything I could have bought at a home decor store!
This post will give you 15 awesome DIY aesthetic room decor ideas on a budget. These projects are easy to make and will instantly add style and personality to your space. From fairy light canopies to personalized wall art and cozy reading nooks, we’ve got ideas for every aesthetic! Whether you’re into minimalist, boho, cottagecore, or Y2K vibes, there’s something here that will transform your room into a space you love.
We’ve curated these DIY aesthetic room decor projects based on current trends, ease of completion, and affordability. Each idea costs less than $50 to create—most are even under $20! So grab your crafting supplies and let’s get started on giving your room the glow-up it deserves.
The 15 DIY Ideas
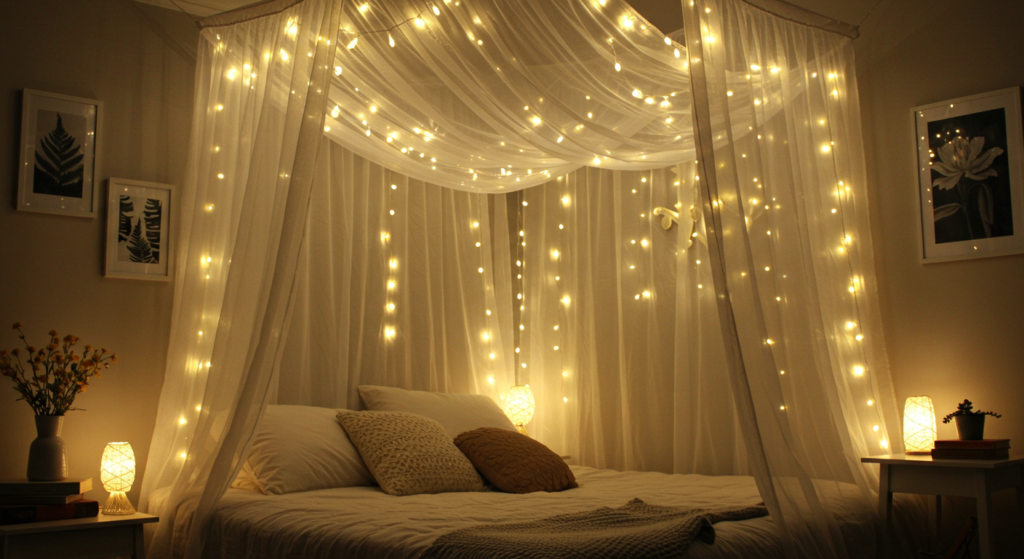
1. Fairy Light Canopy: Create a Dreamy Atmosphere
Transform your bedroom into a magical retreat with this simple yet stunning fairy light canopy.
Materials Needed:
- 2-3 sets of battery-operated fairy lights (30-50 ft total)
- Sheer curtain fabric or tulle (4-6 yards)
- Command hooks or small nails
- Thumbtacks or pushpins
- Fishing line (optional)
Tools Needed:
- Scissors
- Measuring tape
- Step stool or ladder
Difficulty Level: Medium
Estimated Time: 45 minutes
Step-by-Step Instructions:
- Decide where you want to place your canopy—above your bed is the most popular choice.
- Install 4-6 command hooks on the ceiling in a rectangular pattern.
- Drape the sheer fabric over the hooks, creating a canopy effect.
- Secure any loose fabric with pushpins if necessary.
- Weave fairy lights throughout the fabric, making sure to distribute them evenly.
- Hide the battery packs behind the fabric or attach them to the wall.
Tips & Tricks:
- Use warm white lights for a cozy feel or color-changing lights for a more playful vibe.
- For extra whimsy, add paper butterflies, artificial flowers, or star cutouts to the fabric.
Customization Ideas:
- For a bohemian look, use macramé string instead of sheer fabric.
- For a minimalist aesthetic, use white fabric and warm white lights only.
For additional inspiration, check out these resources:
- DIY fairy light canopy entrance ideas
- How to hang fairy lights on bed canopy
- Fairy light canopy ideas on Pinterest
One thing to consider is the weight of the fabric and lights when choosing command hooks – make sure they can support the combined weight to avoid any midnight surprises!
2. Pressed Flower Wall Art: Bringing Nature Indoors
Create beautiful botanical wall art that adds a touch of nature and color to your space.

Materials Needed:
- Fresh flowers and leaves
- Heavy books
- Parchment or wax paper
- Frame(s) with glass front
- White or colored cardstock
- Double-sided tape or craft glue
Tools Needed:
- Tweezers
- Scissors
Difficulty Level: Beginner
Estimated Time: 1-2 weeks (including drying time)
Step-by-Step Instructions:
- Collect flowers and leaves—wildflowers, pansies, and ferns work especially well.
- Place them between two sheets of parchment paper.
- Insert between the pages of a heavy book and stack additional books on top.
- Leave for 1-2 weeks until completely dried and flat.
- Once dried, carefully arrange your pressed flowers on cardstock.
- Secure with tiny dabs of glue or double-sided tape.
- Place in frame and hang on your wall.
Tips & Tricks:
- Pick flowers after the morning dew has dried for best results.
- Change the parchment paper after 2-3 days to prevent moisture damage.
Customization Ideas:
- Create a monogram with pressed flowers for a personalized touch.
- Use colored cardstock to make the flowers pop.
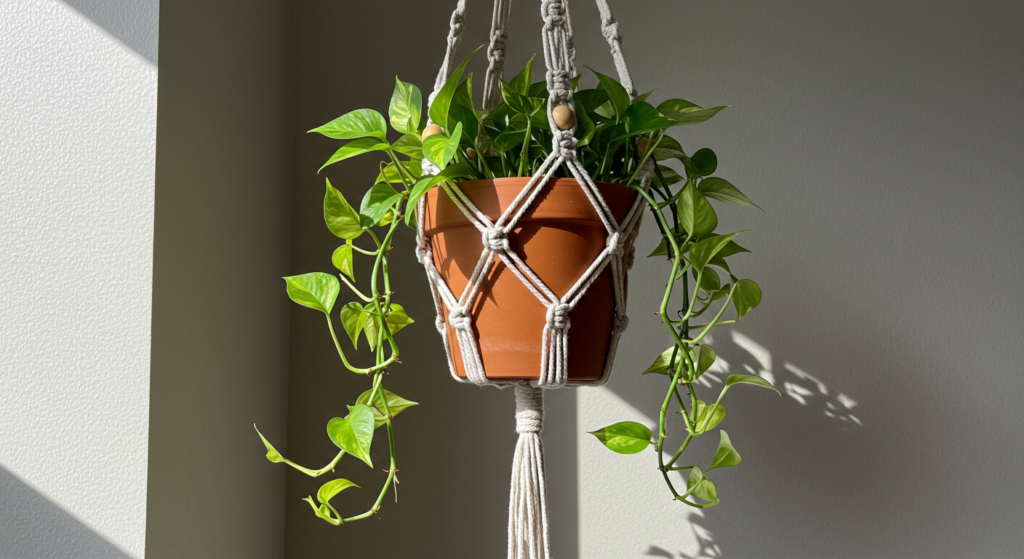
3. Macramé Plant Hanger: Elevate Your Greenery
Adding plants to your room improves air quality and creates a calming environment. These DIY macramé elevate your plants—literally!
Materials Needed:
- Macramé cord (4mm thickness recommended)
- Wooden beads (optional)
- Metal ring (2-3 inches in diameter)
- Small indoor plant in pot
Tools Needed:
- Scissors
- Measuring tape
- S-hook or ceiling hook
Difficulty Level: Intermediate
Estimated Time: 2 hours
Step-by-Step Instructions:
- Cut 8 pieces of macramé cord, each about 8 feet long.
- Fold all cords in half and attach them to the metal ring using a larks head knot.
- Separate the cords into 4 groups of 4 strands each.
- Create square knots down each group for about 6-8 inches.
- Combine groups and continue knotting in a pattern of your choice.
- Add beads if desired.
- Create a basket at the bottom to hold your plant pot.
- Trim excess cord and unravel the ends for a fringed look.
Tips & Tricks:
- Watch tutorial videos for specific knot techniques if you’re new to macramé.
- Start with a lightweight plant until you’re confident in your knot security.
Customization Ideas:
- Dye your cord before starting for a colorful hanger.
- Create a double or triple-tiered hanger for multiple small plants.
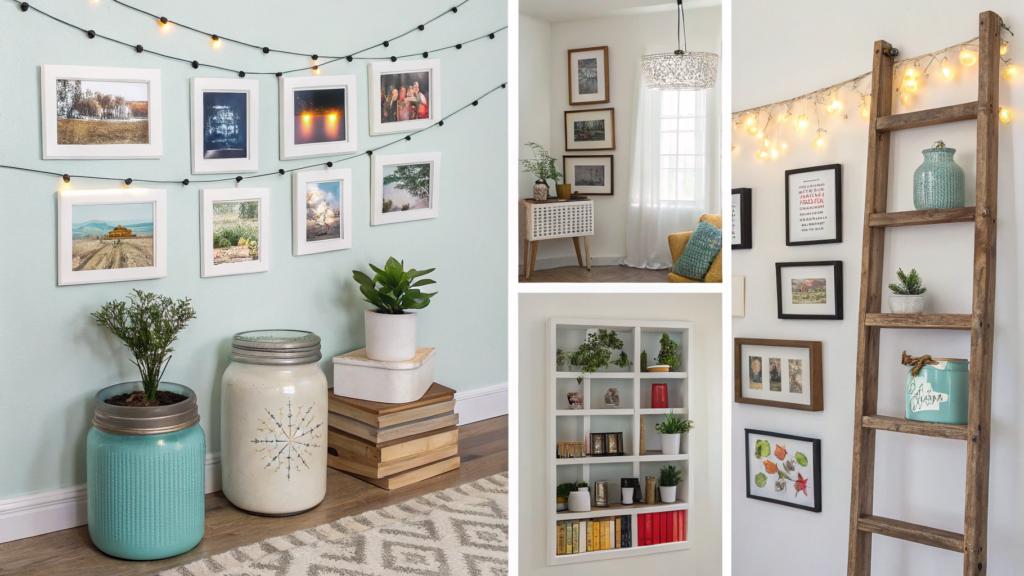
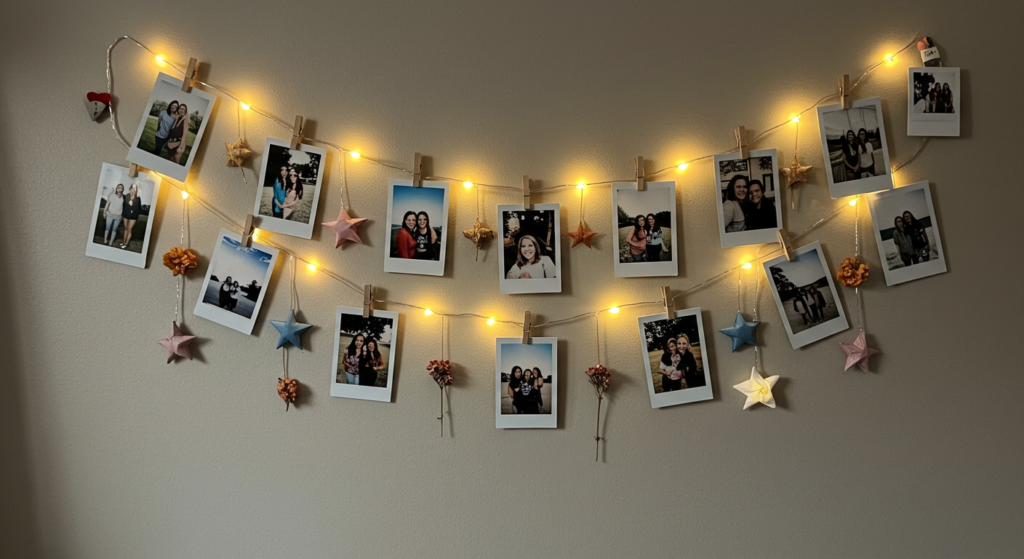
4. Photo Display with Fairy Lights: Illuminate Your Memories
Turn your favorite photos into a glowing display that adds personality and warmth to any wall.
Materials Needed:
- String of battery-operated mini fairy lights (with clips if possible)
- Printed photos (Polaroid style works best)
- Mini wooden clothespins (if lights don’t have clips)
- Command hooks or pushpins
- Washi tape (optional)
Tools Needed:
- Scissors
- Printer or photo printing service
Difficulty Level: Beginner
Estimated Time: 30 minutes
Step-by-Step Instructions:
- Print or collect 15-20 of your favorite photos.
- Install command hooks at the corners of where you want your display.
- String the fairy lights between the hooks in a zigzag or straight-line pattern.
- Attach photos to the string using the clips or mini clothespins.
- Adjust spacing until you’re happy with the arrangement.
- Hide the battery pack behind furniture or attach it discreetly to the wall.
Tips & Tricks:
- Use photos with similar color schemes for a cohesive look.
- Leave some space between photos to let the light shine through.
Customization Ideas:
- Add pressed leaves, small drawings, or quotes between photos.
- Arrange photos in chronological order to tell a story.
For additional inspiration, check out these resources:
Photo Display with Fairy Lights
5. Custom Painted Plant Pots: Add Color and Personality
Transform plain terracotta pots into custom pieces of art that complement your room’s aesthetic.

Materials Needed:
- Plain terracotta pots
- Acrylic paint in your chosen colors
- Clear acrylic sealer spray
- Painter’s tape (for designs)
- Paintbrushes of various sizes
- Small indoor plants
Tools Needed:
- Palette or paper plate for mixing paints
- Water cup for rinsing brushes
- Newspapers to protect your surface
Difficulty Level: Beginner
Estimated Time: 2-3 hours (including drying time)
Step-by-Step Instructions:
- Clean pots thoroughly and let dry completely.
- Apply a base coat of paint and allow to dry (may need 2 coats).
- Use painter’s tape to create geometric designs if desired.
- Paint your designs using contrasting colors.
- Let dry completely (about 1 hour).
- Apply a clear sealer to protect your design.
- Once dry, add your plants.
Tips & Tricks:
- Seal the inside of the pot with clear sealer if you plan to water directly in the pot (rather than using a plastic insert).
- Use a hairdryer on low setting to speed up drying time between coats.
Customization Ideas:
- Create an ombré effect by blending colors from dark to light.
- Add metallic accents with gold or silver paint.
- Paint abstract faces or botanical designs for a trendy look.
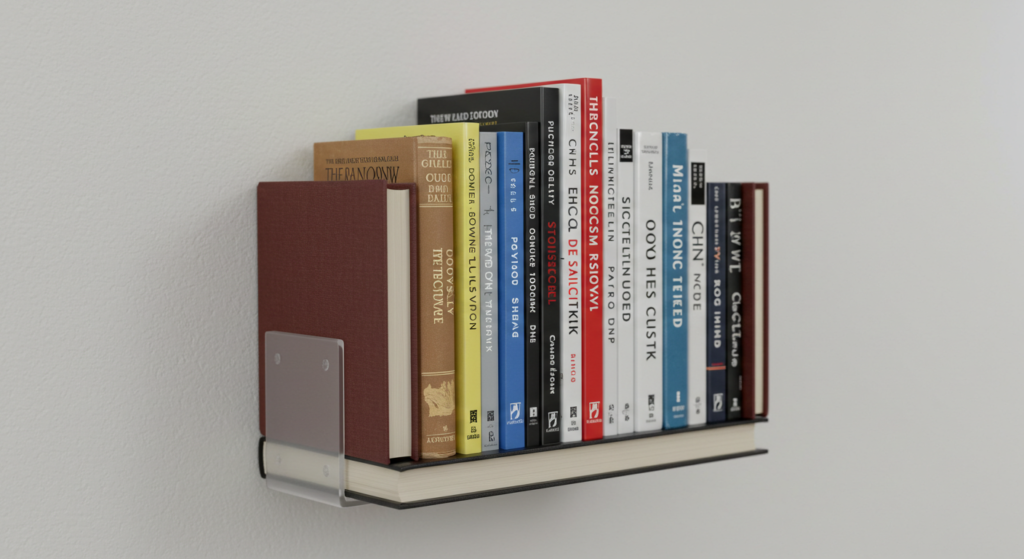
6. Floating Bookshelf: Stylish Storage Solution
Create the illusion of floating books with this clever and inexpensive storage solution.
Materials Needed:
- L-brackets (2 per shelf)
- Screws
- Hardcover books (1 for each shelf)
- Double-sided strong mounting tape
Tools Needed:
- Screwdriver
- Level
- Pencil for marking
- Drill (optional)
Difficulty Level: Beginner
Estimated Time: 45 minutes
Step-by-Step Instructions:
- Choose a book with a sturdy hardcover to be your base.
- Attach one L-bracket to the inside back cover using strong double-sided tape.
- Attach the second L-bracket to the inside front cover.
- Mark where you want your “shelf” on the wall.
- Mount the L-brackets to the wall with screws.
- Stack additional books on top of your mounted book.
Tips & Tricks:
- Choose books with similar width for a more uniform look.
- The bottom book won’t be readable anymore, so use one you don’t plan to read.
Customization Ideas:
- Create a staggered pattern with multiple floating shelves.
- Coordinate book colors with your room’s color scheme.
check out these resources:
Floating Bookshelf: Stylish Storage Solution
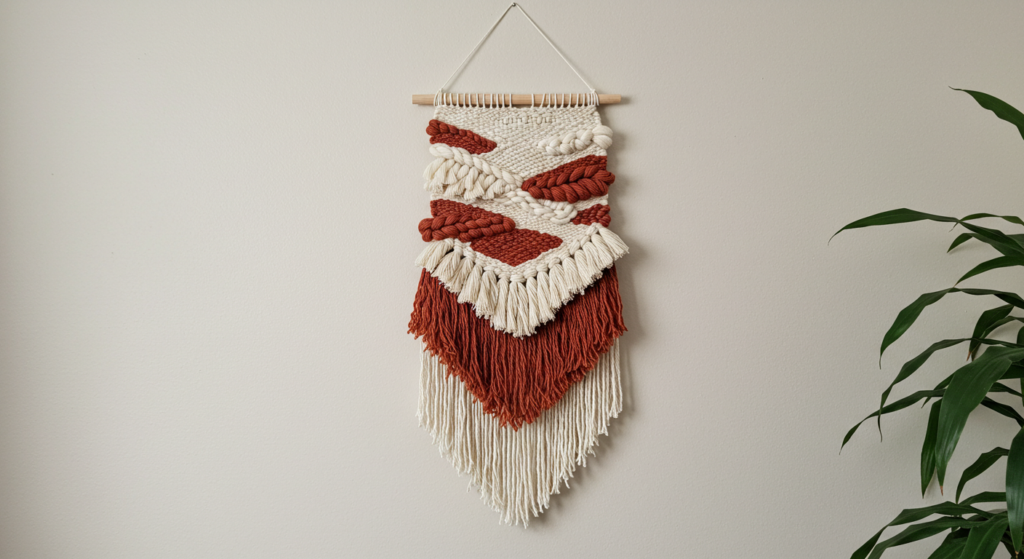
7. Woven Wall Hanging: Textured Boho Art
Create a beautifully textured wall hanging that adds warmth and dimension to any wall, as seen in these examples.
Materials Needed:
- Wooden dowel (about 18-24 inches long)
- Various yarn in complementary colors
- Scrap cardboard (for making a tassel comb)
- String for hanging
Tools Needed:
- Scissors
- Ruler
- Comb
Difficulty Level: Intermediate
Estimated Time: 3-4 hours
Step-by-Step Instructions:
- Cut yarn pieces that are twice the length of your desired wall hanging plus a few inches.
- Fold each piece in half and attach to the dowel using a larks head knot.
- Continue until the dowel is covered with yarn.
- Create different patterns by knotting the yarn in rows.
- Try square knots, diagonal knots, or simple weaving techniques.
- For the bottom, create tassels by wrapping yarn around cardboard and cutting one end.
- Trim the bottom to create a nice shape (V-shape, diagonal, etc.).
- Tie string to each end of the dowel for hanging.
Tips & Tricks:
- Start with a simple design if you’re new to weaving.
- Use a piece of cardboard as a guide to keep your rows straight.
Customization Ideas:
- Add wooden beads or other embellishments.
- Create an ombré effect by gradually changing yarn colors.
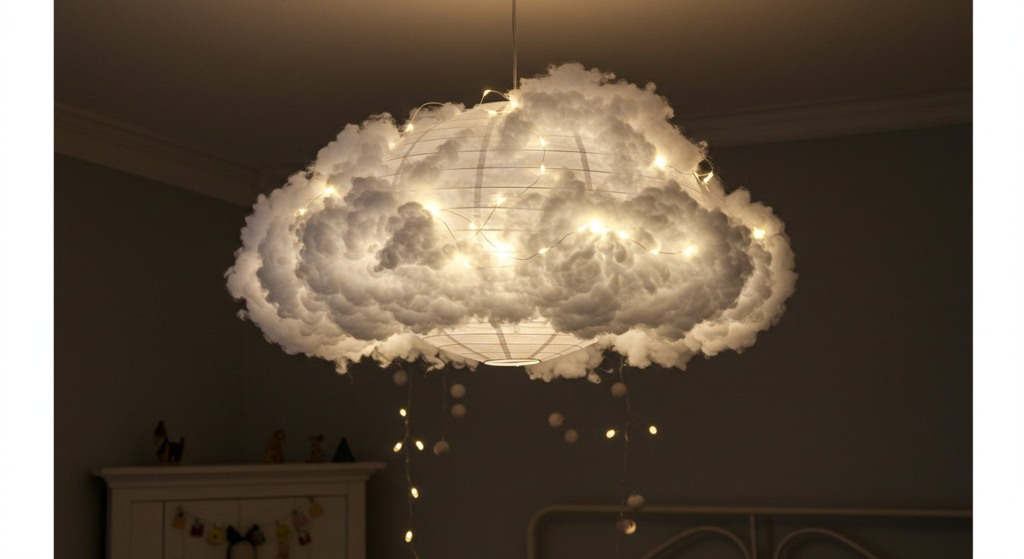
8. DIY Cloud Light: Dreamy Ceiling Decor
Create a whimsical cloud light that adds soft illumination and a touch of magic to your room. Check out this video tutorial for inspiration.
Materials Needed:
- Battery-operated paper lanterns (1-3)
- Polyester fiber fill (found at craft stores)
- Fishing line or clear thread
- Command hooks
- Battery-operated fairy lights
Tools Needed:
- Scissors
- Glue gun
Difficulty Level: Intermediate
Estimated Time: 2 hours
Step-by-Step Instructions:
- Inflate the paper lanterns and secure them closed.
- Insert fairy lights into the lanterns or wrap around the outside.
- Use a hot glue gun to attach small pieces of fiber fill all over the lanterns.
- Continue adding fiber fill until you achieve a fluffy cloud appearance.
- Attach fishing line to the top of your cloud for hanging.
- Install command hooks on the ceiling and hang your cloud.
Tips & Tricks:
- Use white or soft blue fairy lights for a gentle glow.
- Create clouds of different sizes for a more natural look.
Customization Ideas:
- Add a hint of lavender or pink fiber fill for a sunset cloud effect.
- Create a mobile with multiple small clouds at different heights.
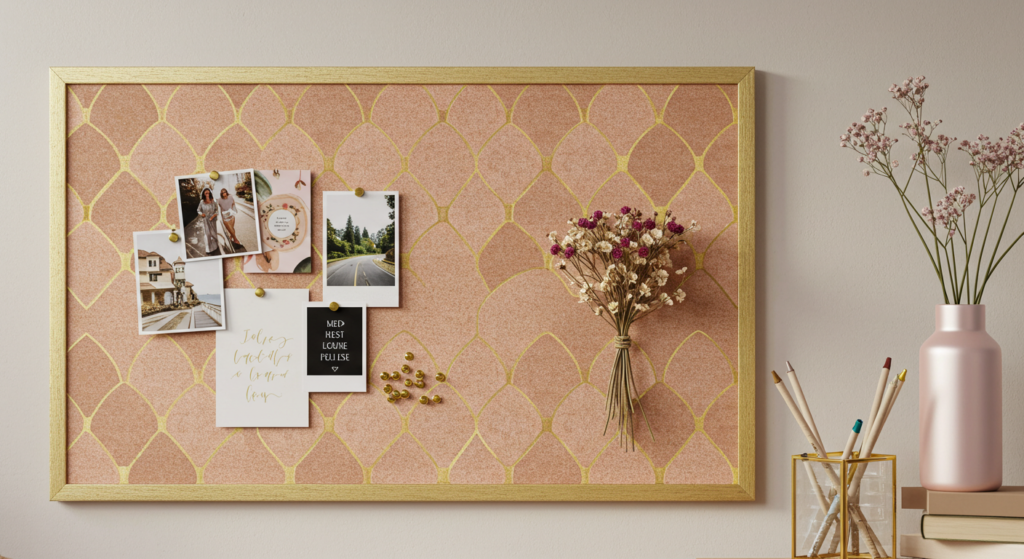
9. Custom Fabric Pinboard: Functional Wall Decor
Create a beautiful and functional pinboard that matches your room’s aesthetic perfectly.
Materials Needed:
- Cork board or foam board
- Fabric of your choice (slightly larger than your board)
- Batting or quilt padding (optional, for extra softness)
- Decorative ribbon, buttons, or other embellishments
- Pushpins or thumb tacks in complementary colors
Tools Needed:
- Scissors
- Staple gun or strong glue
- Iron (to smooth fabric)
Difficulty Level: Beginner
Estimated Time: 1 hour
Step-by-Step Instructions:
- Iron your fabric to remove any wrinkles.
- Lay the fabric face down on a flat surface.
- Place batting on top (if using) and then the cork board.
- Pull fabric tight and secure to the back with staples or glue.
- Fold corners neatly like wrapping a present.
- Add decorative elements like ribbon borders or button accents.
- Mount to wall using appropriate hardware.
Tips & Tricks:
- Choose fabric that complements your existing bedding or curtains.
- Pre-attach some decorative pushpins before hanging for a finished look.
Customization Ideas:
- Create a grid pattern with ribbons for a more organized board.
- Add a fabric pocket at the bottom to hold extra pins or notes.
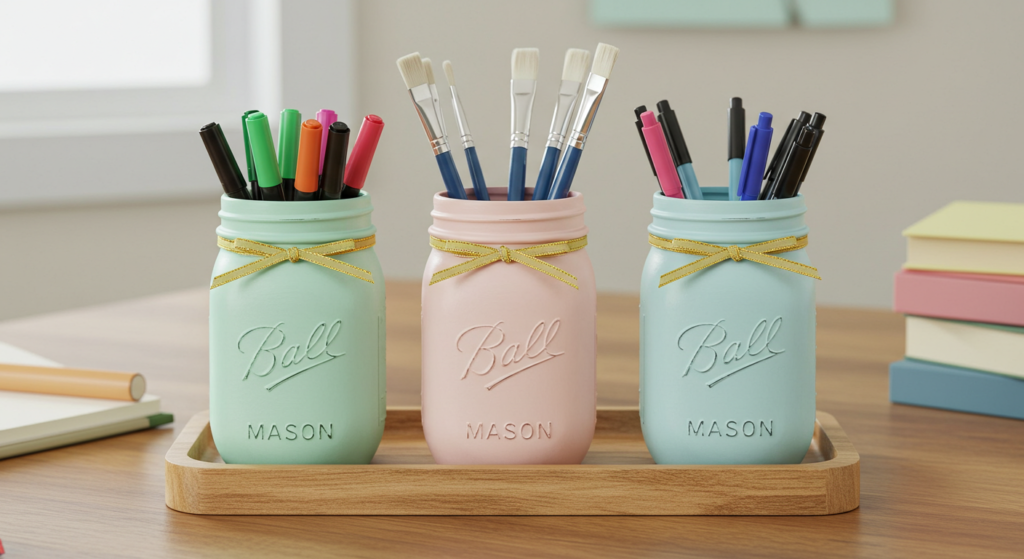
10. Mason Jar Desk Organizers: Stylish Storage
Transform simple mason jars into stylish and functional desk organizers for pens, brushes, and other supplies. Browse Pinterest inspiration for creative ideas.
Materials Needed:
- Mason jars in various sizes
- Spray paint or acrylic paint
- Decorative elements (washi tape, twine, ribbon)
- Clear sealer (optional)
- Wood board or tray (optional, for grouping)
Tools Needed:
- Paintbrushes (if using acrylic paint)
- Newspapers or drop cloth
- Sandpaper (for light sanding if needed)
Difficulty Level: Beginner
Estimated Time: 2 hours (including drying time)
Step-by-Step Instructions:
- Clean jars thoroughly and remove any labels.
- If using spray paint, apply in a well-ventilated area with 2-3 light coats.
- If using acrylic paint, apply several thin coats for even coverage.
- Allow paint to dry completely between coats.
- Add decorative elements like washi tape bands or twine bows.
- Apply clear sealer if desired for durability.
- Group jars on a decorative tray or wood board for a cohesive look.
Tips & Tricks:
- Paint just the bottom half of jars for a dipped effect.
- Use chalk paint for a matte, vintage look.
Customization Ideas:
- Label jars with small chalkboard stickers.
- Create a gradient effect with jars in varying shades of the same color.
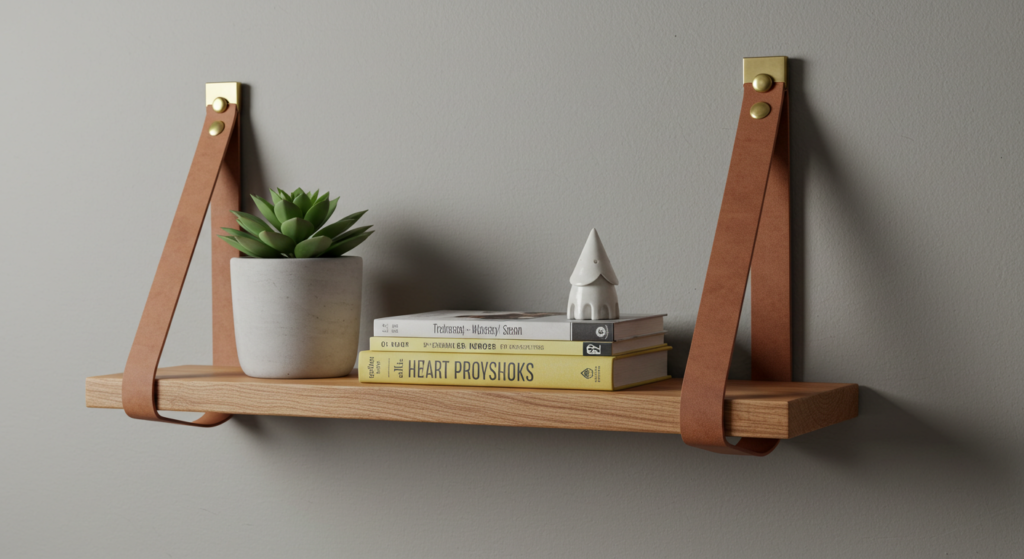
11. Custom Wooden Wall Shelf: Display Your Treasures
Build a simple yet stylish wooden shelf to display plants, books, and decorative items.
Materials Needed:
- Wooden board (1×8 or 1×10, length of your choice)
- Stain or paint
- Leather straps or decorative rope
- Wall anchors and screws
- Sandpaper (medium and fine grit)
Tools Needed:
- Drill
- Measuring tape
- Level
- Paintbrush or cloth for staining
Difficulty Level: Intermediate
Estimated Time: 3 hours (including drying time)
Step-by-Step Instructions:
- Sand the wooden board until smooth, working from medium to fine grit.
- Apply stain or paint according to product instructions.
- Allow to dry completely.
- Drill holes at each end of the board for hanging straps.
- Thread leather straps or rope through the holes.
- Mark wall placement ensuring it’s level.
- Install wall anchors if not drilling into studs.
- Secure shelf to wall with screws through the straps.
Tips & Tricks:
- Use wood conditioner before staining for more even results.
- Make sure your shelf is level before securing to the wall.
Customization Ideas:
- Add wood burning designs before staining.
- Install small hooks on the underside for hanging plants or fairy lights.
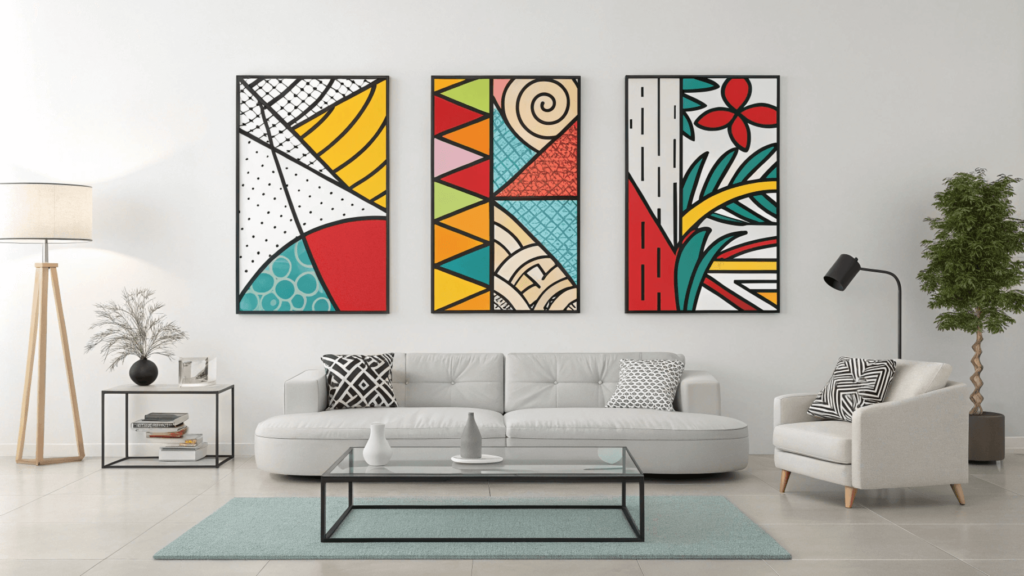
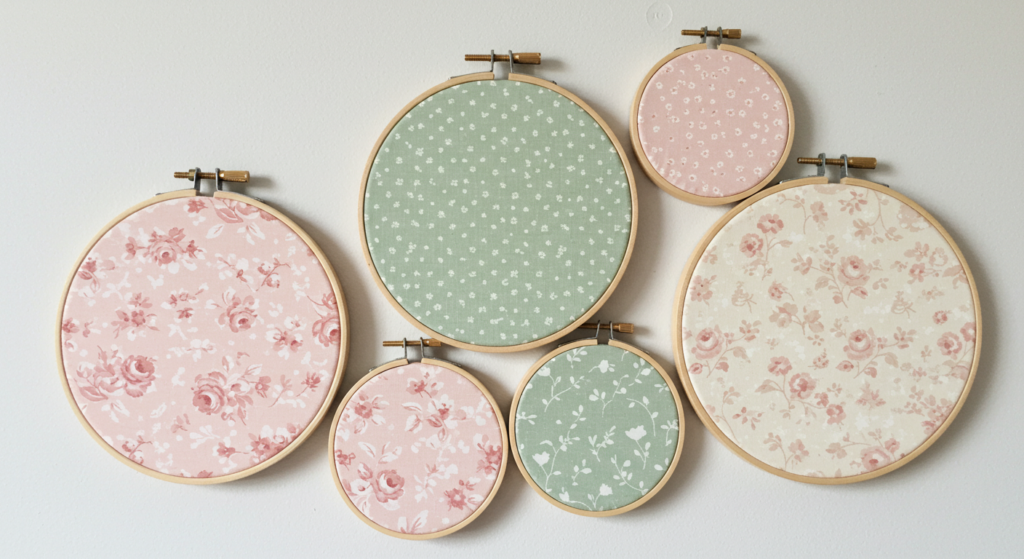
12. Patterned Fabric Wall Art: No-Sew Statement Pieces
Create bold, colorful wall art using embroidery hoops and fabric—no artistic skills required! For a visual guide, check out this helpful tutorial.
Materials Needed:
- Wooden embroidery hoops in various sizes
- Fabric with interesting patterns or prints
- Scissors
- Fabric glue (optional)
Tools Needed:
- Iron (to remove wrinkles from fabric)
Difficulty Level: Beginner
Estimated Time: 30 minutes
Step-by-Step Instructions:
- Iron fabric to remove any wrinkles.
- Separate the inner and outer rings of the embroidery hoop.
- Place fabric over the inner ring.
- Place the outer ring over the fabric and inner ring, then tighten the screw.
- Pull fabric taut as you tighten.
- Trim excess fabric, leaving about 1 inch all around.
- Fold excess fabric to the back and secure with fabric glue if needed.
- Arrange hoops in a pleasing pattern on your wall.
Tips & Tricks:
- Choose fabrics that complement your room’s color scheme.
- Mix different sized hoops for visual interest.
Customization Ideas:
- Layer smaller hoops over larger ones for a dimensional effect.
- Add embroidered details or appliqués for extra personality.
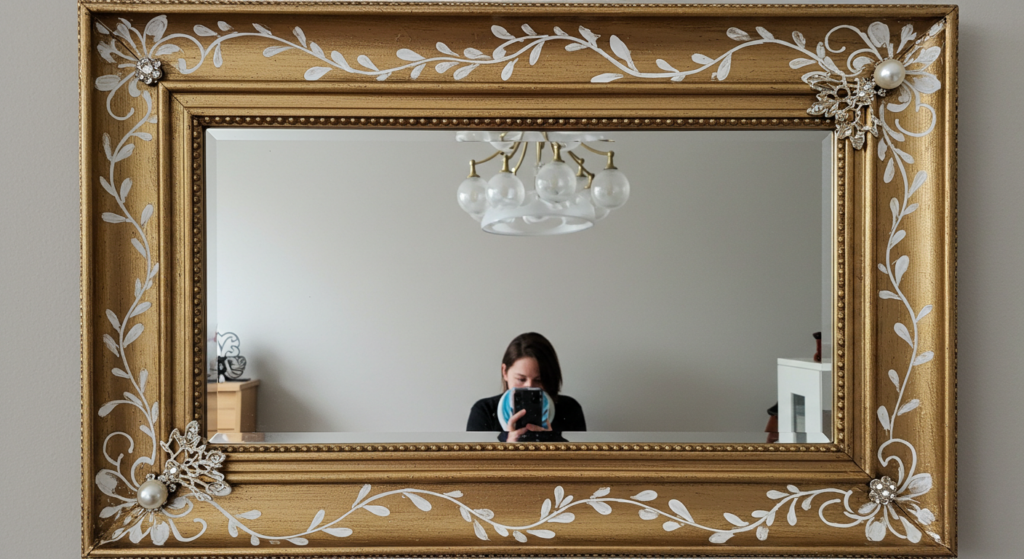
13. Painted Mirror Frame: Reflect Your Style
Transform a plain mirror into a statement piece that enhances your room’s aesthetic. For a visual guide, check out this helpful tutorial.
Materials Needed:
- Plain mirror with frame (thrift stores are great for these)
- Acrylic paint in your chosen colors
- Clear sealer
- Painter’s tape
- Decorative elements like faux flowers, gems, or seashells (optional)
Tools Needed:
- Various paintbrushes
- Sandpaper (if frame needs prep)
- Hot glue gun (for decorative elements)
Difficulty Level: Beginner
Estimated Time: 2-3 hours (including drying time)
Step-by-Step Instructions:
- Remove any dust or grime from the frame.
- Lightly sand if needed to help paint adhere.
- Tape off the mirror portion to protect it.
- Apply base coat of paint and let dry.
- Add designs, patterns, or additional colors.
- Once dry, apply clear sealer for durability.
- Add any decorative elements with hot glue.
- Hang in desired location.
Tips & Tricks:
- Use a credit card to smooth out air bubbles under the painter’s tape.
- Apply multiple thin coats rather than one thick coat for better results.
Customization Ideas:
- Create an ombré effect by blending paint colors.
- Add metallic highlights with gold leaf or metallic paint.
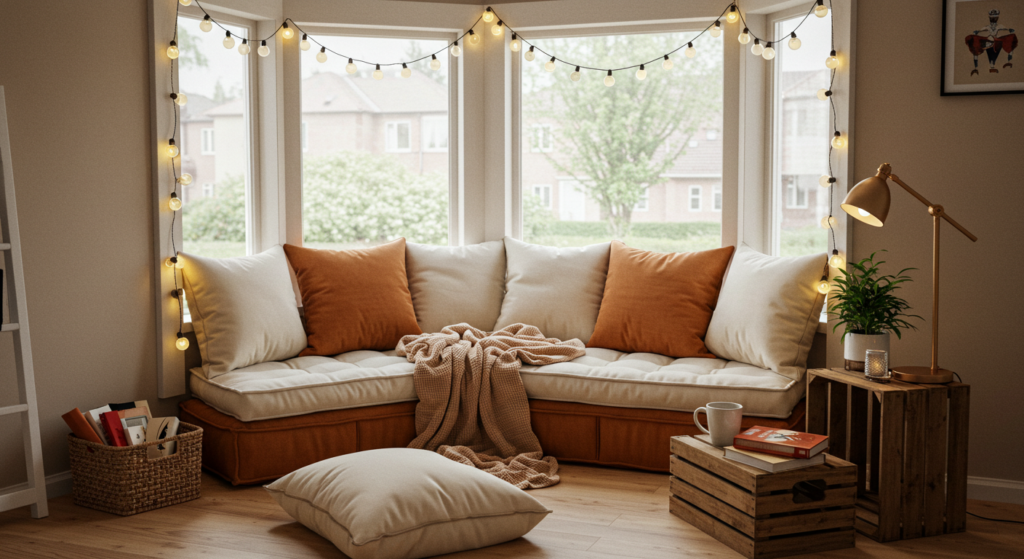
14. Cozy Reading Nook: Your Personal Retreat
Transform a corner of your room into a cozy sanctuary for reading and relaxation.
Materials Needed:
- Large floor pillows or cushions
- Throw blankets
- String lights or small lamp
- Small side table or crate
- Decorative pillows
- Canopy fabric (optional)
Tools Needed:
- Command hooks (if hanging canopy or lights)
Difficulty Level: Beginner
Estimated Time: 1 hour
Step-by-Step Instructions:
- Choose a corner or window area for your nook.
- Layer large floor pillows or cushions as your base.
- Add smaller decorative pillows for back support.
- Place a small side table nearby for books and drinks.
- Hang string lights around the area or add a small lamp.
- Drape a throw blanket for extra coziness.
- If desired, create a simple canopy overhead using fabric and command hooks.
Tips & Tricks:
- Choose a spot with good natural light for daytime reading.
- Make sure you have easy access to outlets if adding lighting.
Customization Ideas:
- Add a hanging plant to bring life to your reading corner.
- Incorporate a small bookshelf or floating shelves nearby.
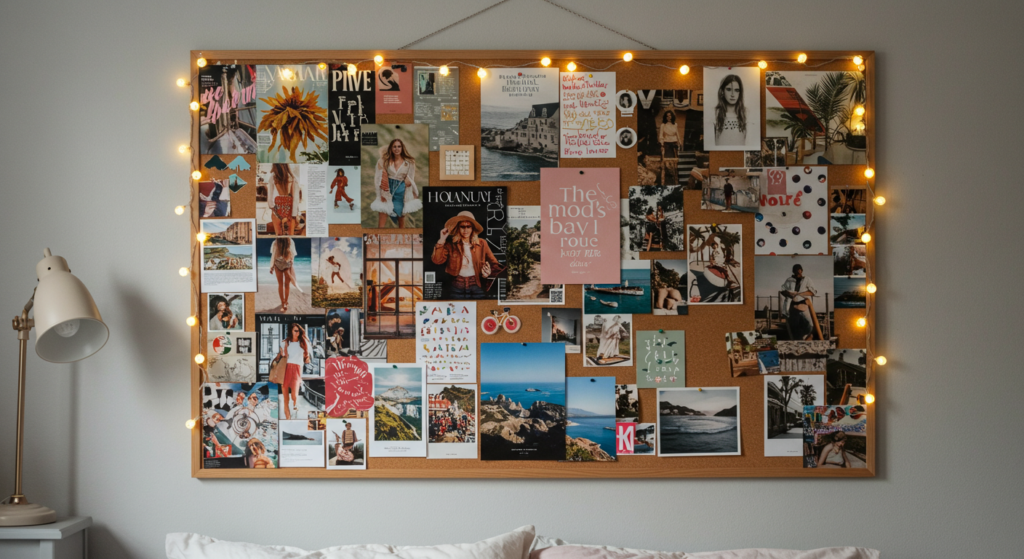
15. Mood Board: Visualize Your Dreams
Create a personalized mood board that inspires you daily and adds a custom touch to your room.
Materials Needed:
- Cork board, foam board, or large canvas
- Magazine cutouts, photos, postcards, fabric swatches
- Inspirational quotes printed or handwritten
- Pushpins, washi tape, or glue
- Ribbon, fairy lights, or other decorative elements
Tools Needed:
- Scissors
- Printer (optional, for printing quotes or images)
Difficulty Level: Beginner
Estimated Time: 2 hours
Step-by-Step Instructions:
- Decide on a theme or color scheme for your mood board.
- Collect images, quotes, and materials that inspire you.
- Arrange elements on your board before attaching them.
- Once you’re happy with the layout, secure everything with pins, tape, or glue.
- Add decorative elements like ribbons or fairy lights around the edges.
- Hang in a spot where you’ll see it daily.
Tips & Tricks:
- Leave some empty space to add new inspiration later.
- Take a photo of your layout before securing items, in case you need to rearrange.
Customization Ideas:
- Create a seasonal mood board that you update throughout the year.
- Focus on specific goals or dreams with targeted imagery.
Conclusion
Transforming your space doesn’t require a professional decorator or a huge budget. With these 15 DIY aesthetic room decor ideas, you can create a personalized sanctuary that reflects your unique style and personality. The best part? You’ll feel a sense of pride and accomplishment every time you look at your handmade creations.
Remember that the most important aspect of room decor is that it makes YOU happy. Don’t be afraid to experiment, mix different aesthetics, or put your own spin on these ideas. Your room should be a reflection of who you are and what brings you joy.
Which of these DIY ideas is your favorite? Are you planning to try any this weekend? Let us know in the comments! And if you create any of these projects, we’d love to see them—share your photos on social media with #DIYRoomDecor. checkout my other relevant blog Budget-Friendly Decorating Ideas for Every Room
For more budget-friendly DIY inspiration, check out this amazing YouTube channel with tons of aesthetic room decor tutorials. Happy crafting!